MDT?
In a Enterprise network, directly upgrading the network operating systems are difficult task. But upgrade to Windows 10 using MDT is the easiest way to upgrade the old machines. As network admin you already know the importance of OS and application deployment rules in a enterprise network. And also must be familiar with Microsoft Deployment Toolkit, Windows Deployment Services and deployment operations.
In this practice lab I will show you how to upgrade to Windows 10 using MDT and refresh old machines with new operating system. You need to be familiar with MDT installation and creating deployment share with MDT. If you are beginner and don’t know the basic of deploying Windows with MDT and WDS, I recommend you to read the below article before continuing this post.
Try to create your own test lab and continue this article. In the final stage I had faced with an error, hope it will not issue that for you.
Step 1: Import Windows 10 full source to MDT
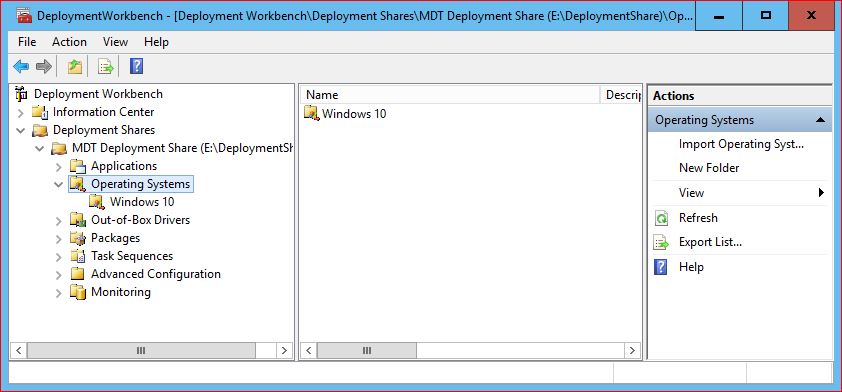
Adding Windows 10 full sources to MDT will be done through MDT Deployment Workbench. I already have my deployment lab which installed and configured MDT as deployment Server in a Windows Server 2016. So go to open deployment workbench and import Windows 10 and create an upgrade task sequence.
- Open Deployment Workbench from start menu in your MDT machine. Create a folder for Windows 10 on Operating system section.
2. Simply right click Windows 10 folder and select Import Operating System to open the OS Type page.
3. On the OS Type page select Full set of source files and go to the next page.
4. Put the Windows 10 disc to DVD ROM or mount the Windows 10 Image and select the directory drive then click Next.
5. On the Summary page read details and click Next to start importing Windows 10. Finally on Confirmation page click Finish to close the page and the Windows 10 should be ready.
Step 2: Create an Upgrade Task Sequence in MDT
On the Task Sequence section of Deployment workbench, create a folder relevant to upgrade to Windows 10 using MDT.
- Right click the Task Sequence and create a folder, so do right click the folder and select New Task Sequence. Now on the General Settings page fill out the task id, name and comments then click Next.
2. Select the Standard Client Upgrade Task Sequence for task sequence template then click Next.
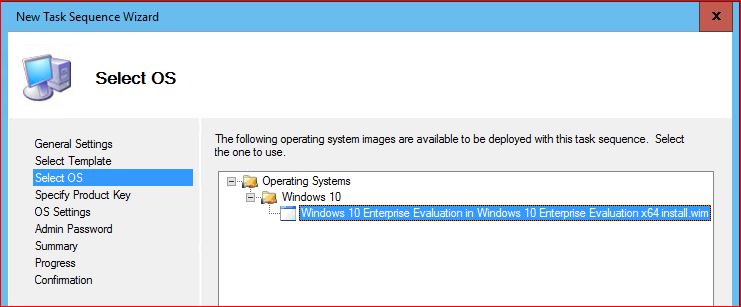
3. Select the previously imported Windows 10 as operating system and click Next.
4. Select the first option Do not specify a product key at this time for now on the Specify Product Key page and click Next.
5. Enter the Full name, Organization and Internet Explorer Home Page correctly on OS Settings page then go to next page.
6. If you like the local Admin account with a password, enter the password, otherwise select Do not specify and Administrator at this time on the Admin Password page and go to Summary page.
7. On the Summary page read the detail and click Next to being creating the upgrade task sequence. Finally on the Confirmation page of Task Sequence close the page.
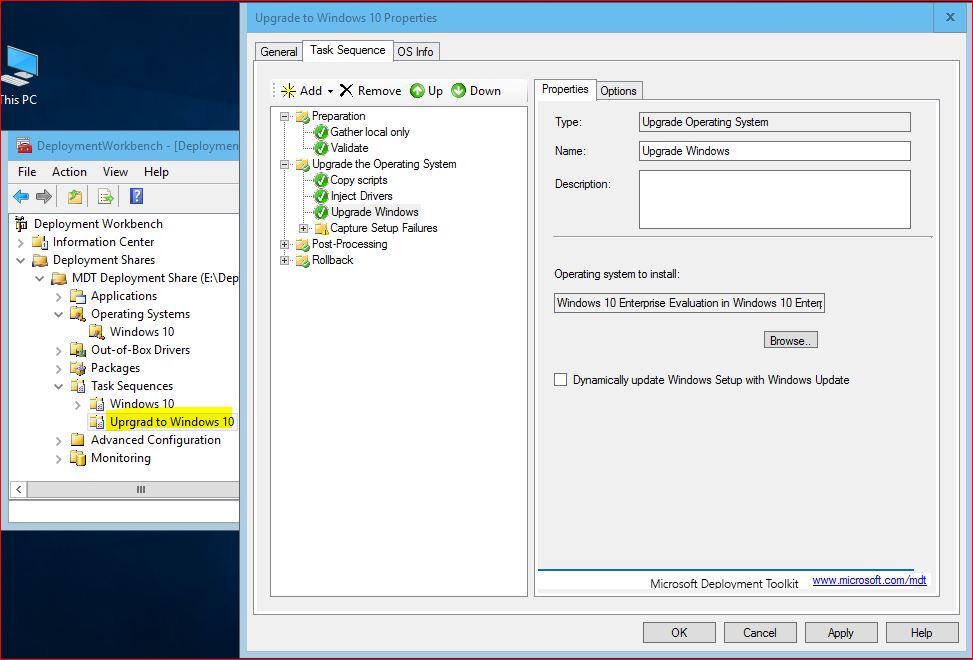
8. Now expand the Upgrade Windows 10 folder and right click the created task sequence then click Properties. See the options on the Task Sequence tab that everything is okay.
Close Task Sequence properties and go to update the MDT deployment share.
Step 3: Update the Upgrade MDT Deployment Share
The final step before performing upgrade to Windows 10 using MDT, try to update the MDT deployment share.
- Right click MDT Deployment Share and click Update Deployment share then select Optimize the boot image updating process and click Next.
2. Read the Summary details and click Next to begin updating MDT Deployment share. Finally the update should be done successfully.
Close the page and go to begin Windows upgrading from Windows 7 or 8 to Windows 10.
Step 4: Upgrade to Windows 10 Using MDT
Lets begin with a Windows 8.1 to upgrade to Windows 10 using MDT in our lab. I hope you could perform all above steps successfully.
- Login to your old machine such as Windows 7 or Windows 8. Then run the Lite Touch script form Windows run like the screenshot. Click Yes to run the script.
The Lite Touch script is a vb script that load the Windows Deployment Wizard from deployment server, where the MDT is installed.
2. When the Lite Touch script will load, select the upgrade task sequence and click Next.
3. Specify a product key if you have, otherwise select No product key is required then click Next. In a production environment you can activate your machine from KMS Server.
4. Do you need to install or update applications also? If you don’t click Next and go to the next page. You can install or updated the applications from this section also. But I don’t want to update or install any software to testing lab.
5. Specify a strong password for Administrator for security reason then click Next.
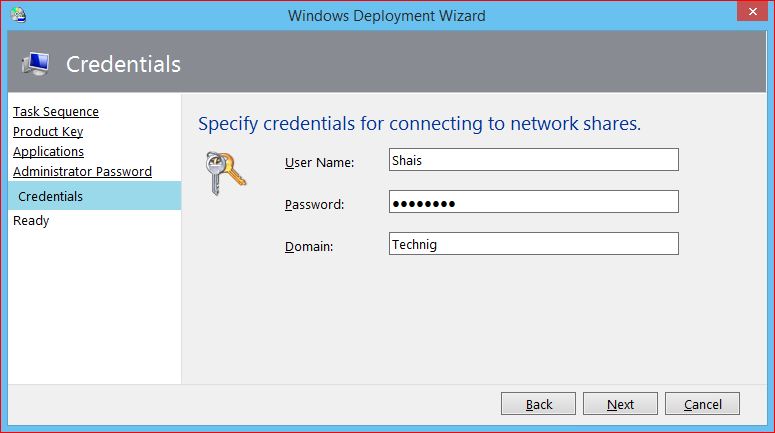
6. Type the appropriate deployment share domain account for connecting to network share then click Next. I’m using the domain admin user for this lab.
7. On the Ready to begin page, read the details and click Begin to start upgrade to Windows 10 using MDT form a network shared.
8. Let the Windows deployment perform the upgrading from Windows 8 to Windows 10 successfully.
- See more at: http://www.technig.com/upgrade-to-windows-10-using-mdt/#sthash.2eU09gcC.dpuf


